
A requisition is an internal request for items: lines with items and requested quantities, raised before any supplier is committed. Releasing it turns the open lines into a purchase order — or into a stock transfer when the request is fulfilled from one of your own branches instead of bought. Each line tracks how much of it is still pending, so one requisition can be released several times until nothing is left.
Open the Procurement app and choose Requisitions. The list is titled All Requisitions; a saved requisition has three tabs — Lines, Related and Details. Its release actions (Release Order, Selective Release Order, Release Transfer, Selective Release Transfer) are record actions; where they appear — as header buttons or in the header's overflow menu — depends on your layout.
Prerequisites
- Create permission on requisitions, and create permission on purchase orders (or transfers) to release into them.
- The items you are requesting set up in the item master and active. An item that requires a SKU needs one on every line.
- A purchase price list with rules for the items if you want Unit Cost filled in automatically; without one the line cost stays blank until you type it.
What the header fields do
| Field | Where | What it does |
|---|---|---|
| Document Date | Header | Stamped with today's date when the requisition is created; you can change it before saving. |
| Supplier Account | Header | Optional. The branch's default supplier is filled in when the branch has one. Whatever is here is copied to the purchase order created by a release, so set it before releasing to an order. Locked after save. |
| From Branch | Header | The supplying branch for the transfer route: a released transfer moves stock from this branch to the requesting branch. Leave it empty for a purchase. |
| Resource | Requisition Configuration | The person the request is raised for; validated as an active resource. |
| Required Date | Requisition Configuration | When the items are needed. It cannot be earlier than today (Required By Date Should not be Backdated). |
| Price List, Tax Group | Requisition Configuration | A purchase-type price list and header taxes are defaulted on create; lines price and tax from them. |
| Partner Account, Branch | System Details | The organization and the branch raising the request. They must belong together and are locked after save. |
| Status | Details | A picklist of Draft and Confirmed that nothing in the release logic writes or reads — set it by editing the record if your team uses it, but never judge release progress from it. |
Procedure
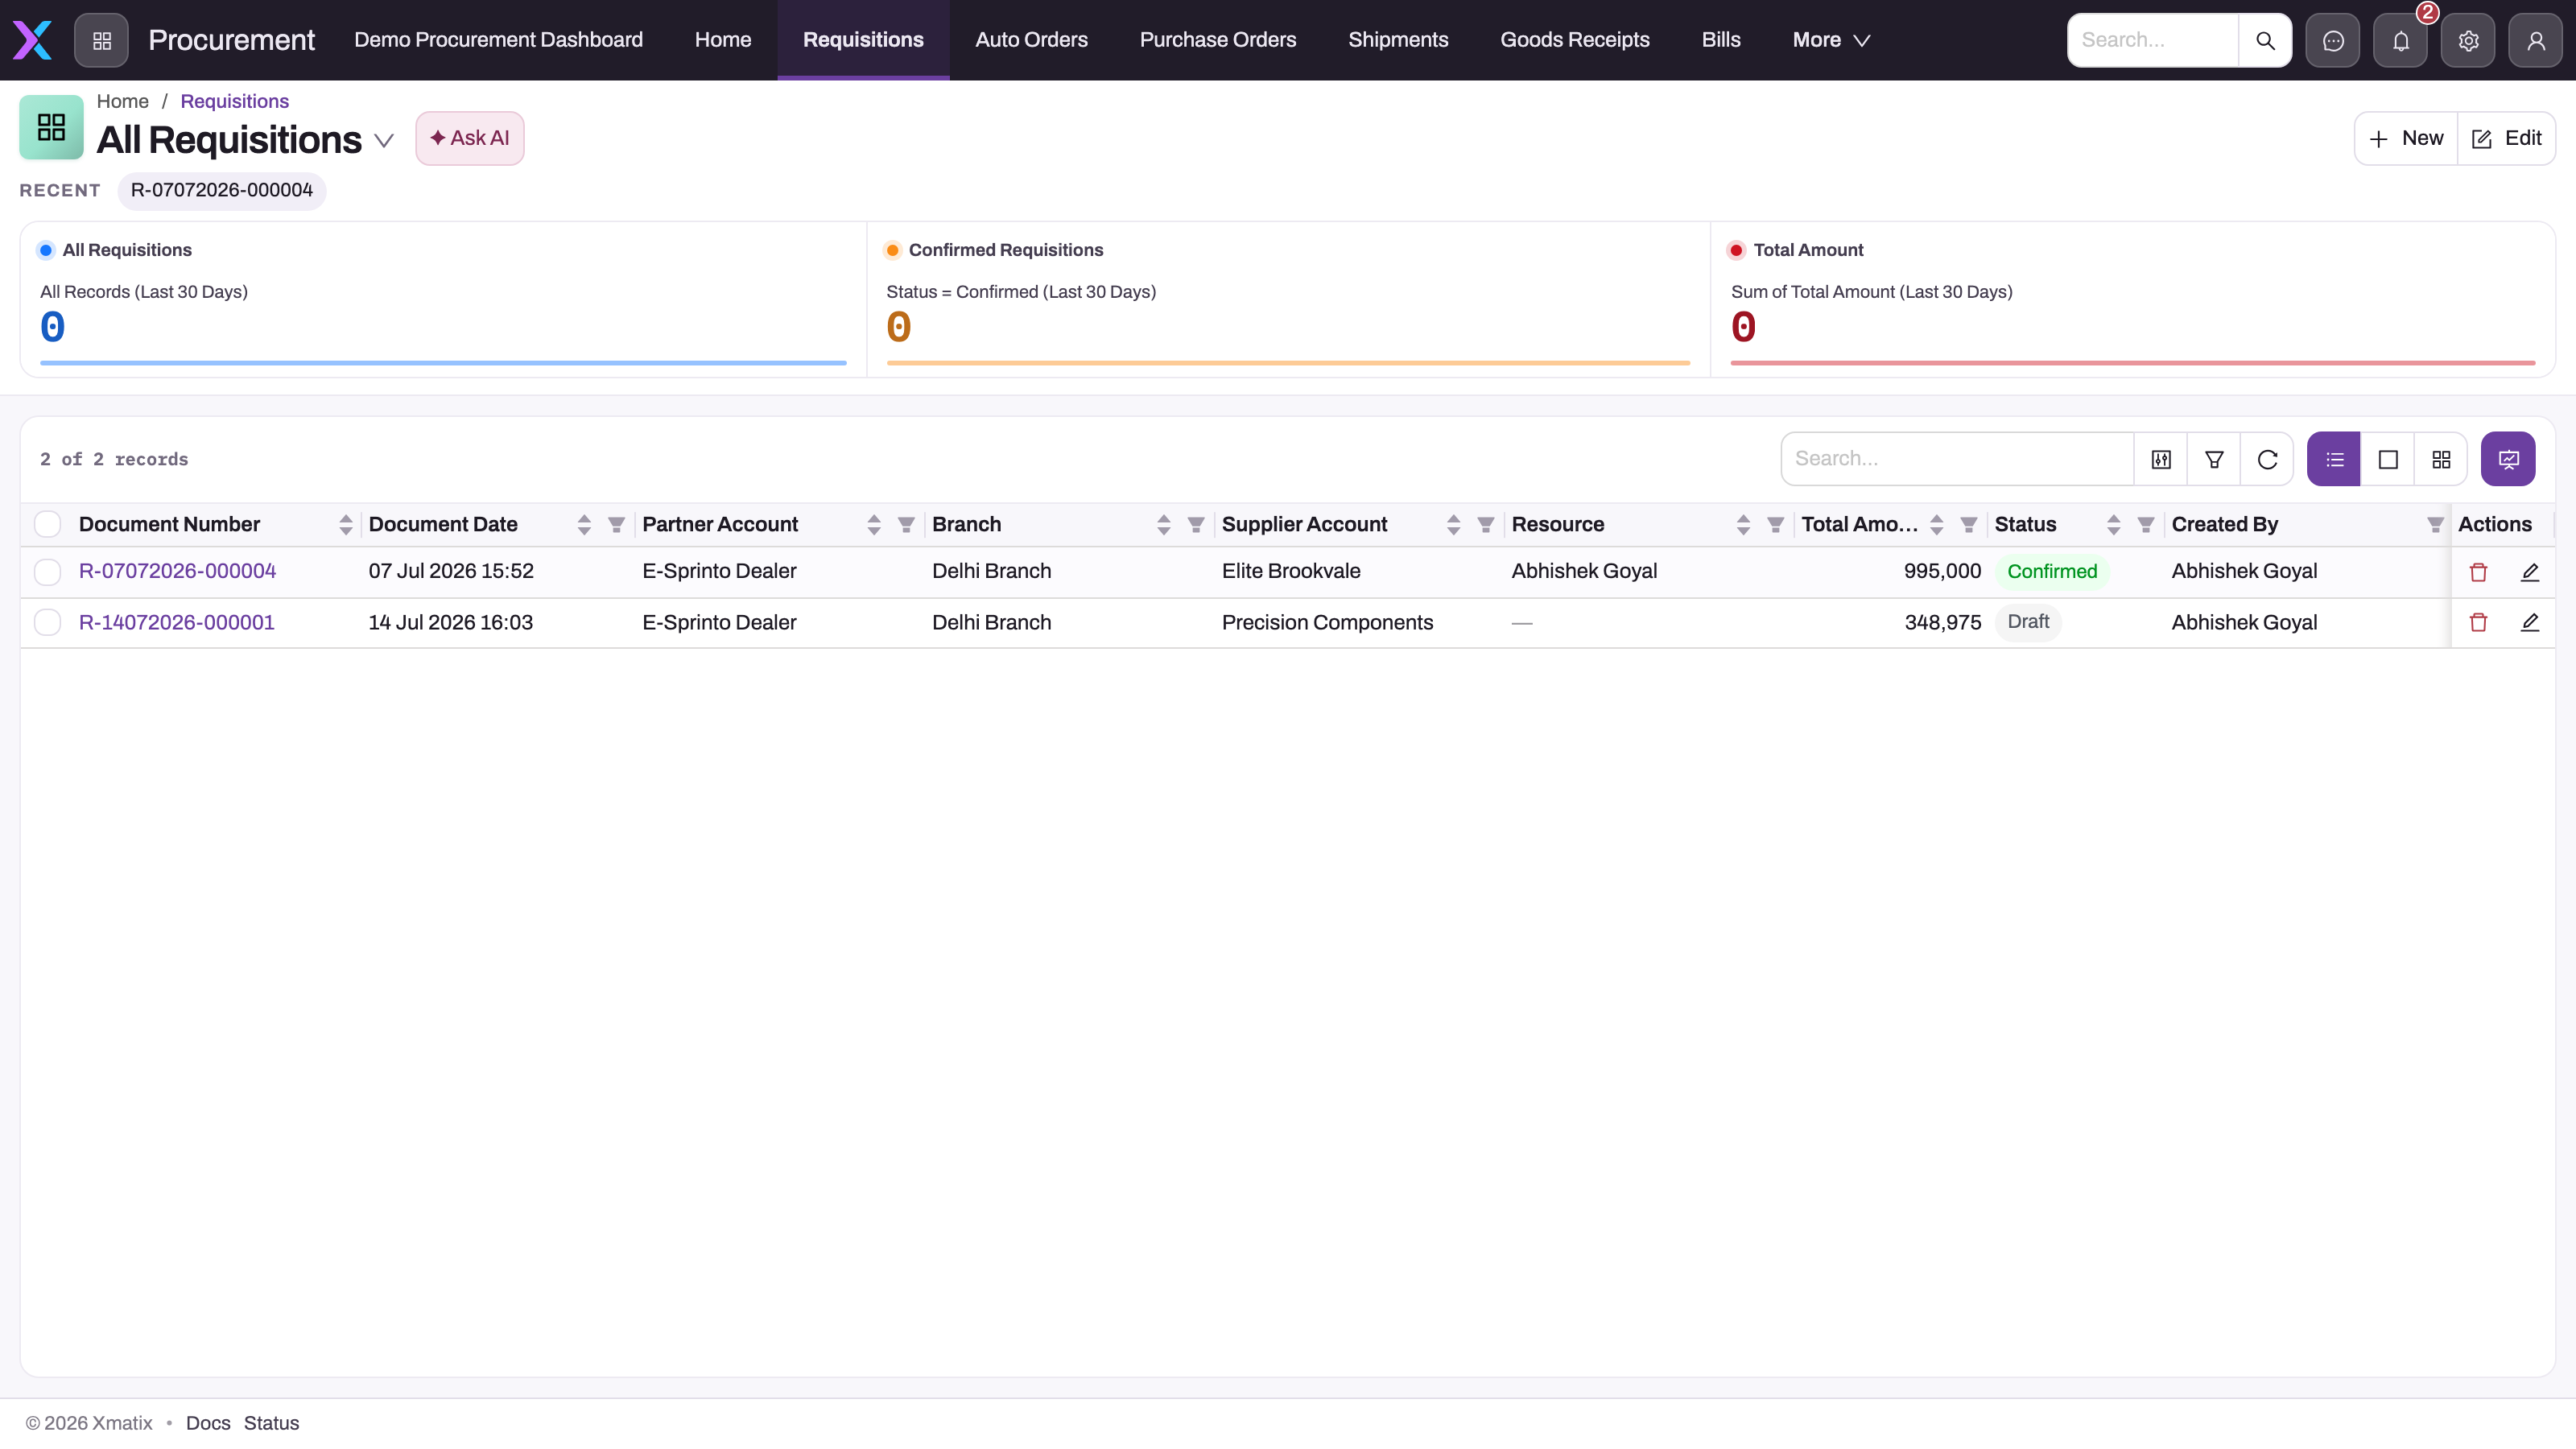
- 1
Open the requisition by its document number to reach the Lines tab and the release actions.
- 2
Partner Account and Branch are copied to every purchase order released from the request and cannot be changed after save; Supplier Account is copied too, so set it before releasing.
- 3
Total Amount is the sum of the lines' quantity x unit cost - an estimate with no discount or tax term.
- 4
Status (Draft / Confirmed) is set by people; releasing to an order or a transfer never changes it.
- 5
The Confirmed Requisitions counter reads that same manual Status, not release progress.
- 6
New opens the create form with Document Date stamped and the branch's default supplier filled in.
Start from All Requisitions. Partner account, branch and supplier identify whose demand a request is; Total Amount is the estimated value of its lines. The Status column is whatever the creator set — open the record and read the Lines tab to know what is still pending.
Step 1 — Create the requisition
Choose New. Fill in the header fields above, open System Details to confirm partner account and branch, and Save. Supplier account, partner account and branch cannot be changed afterwards, so if any of them is wrong delete the request and start again rather than releasing it.
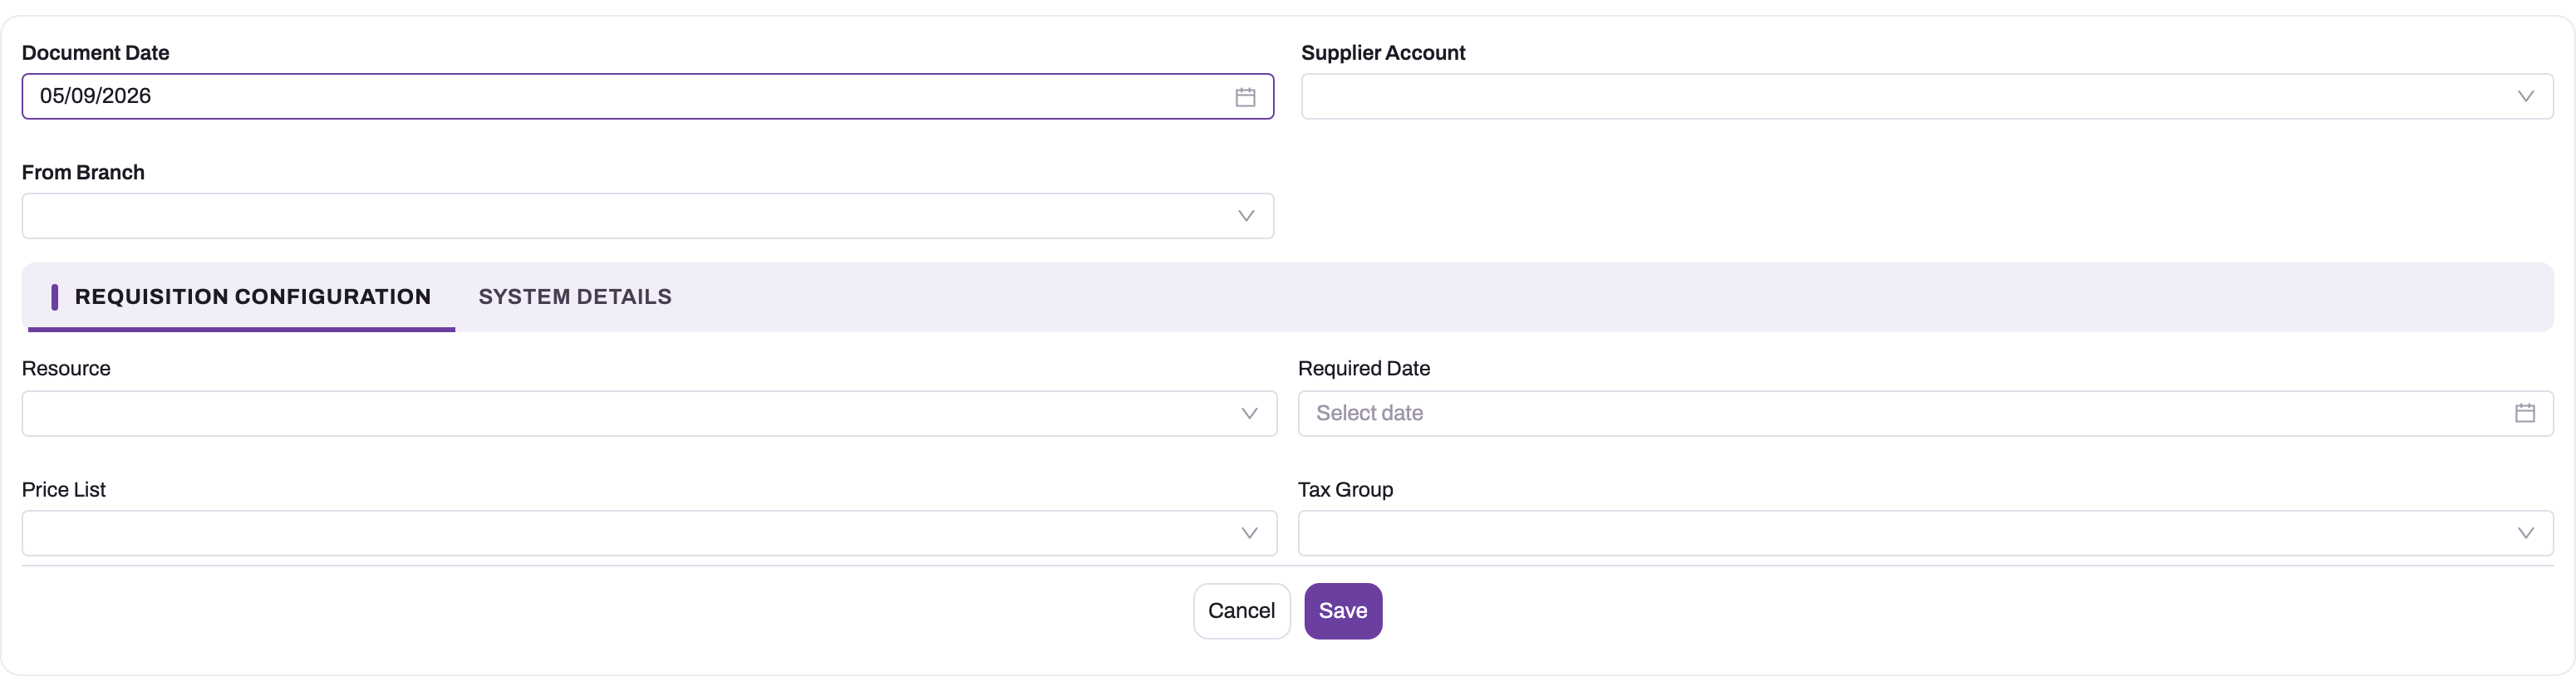
- 1
Document Date is stamped with today when the form opens; change it before saving if the request was raised earlier.
- 2
Supplier Account is optional and defaults to the branch's default supplier; whatever is here is copied to every purchase order released from the request and is locked after save.
- 3
From Branch is the supplying branch for Release Transfer - stock moves from here to the requesting branch. Leave it empty for a purchase.
- 4
System Details holds Partner Account and Branch (the requesting branch); they must belong together and cannot be changed after save.
- 5
Required Date cannot be earlier than today; Resource is validated as an active resource.
- 6
Price List and Tax Group are defaulted to the purchase price list and header taxes; lines take their unit cost and tax from them.
Step 2 — Add the lines
On the saved record open Lines. Add a line per item with Quick Add, pick several at once from the Product Catalogue, or Import a file. Each line needs an item and a quantity greater than zero; Unit Cost is looked up from the requisition's price list and can be overridden, the tax group is resolved from the item, and Amount is quantity × unit cost with no discount or tax term. A package item explodes into component lines; use Product Configurator in the header to choose optional components and their quantities.
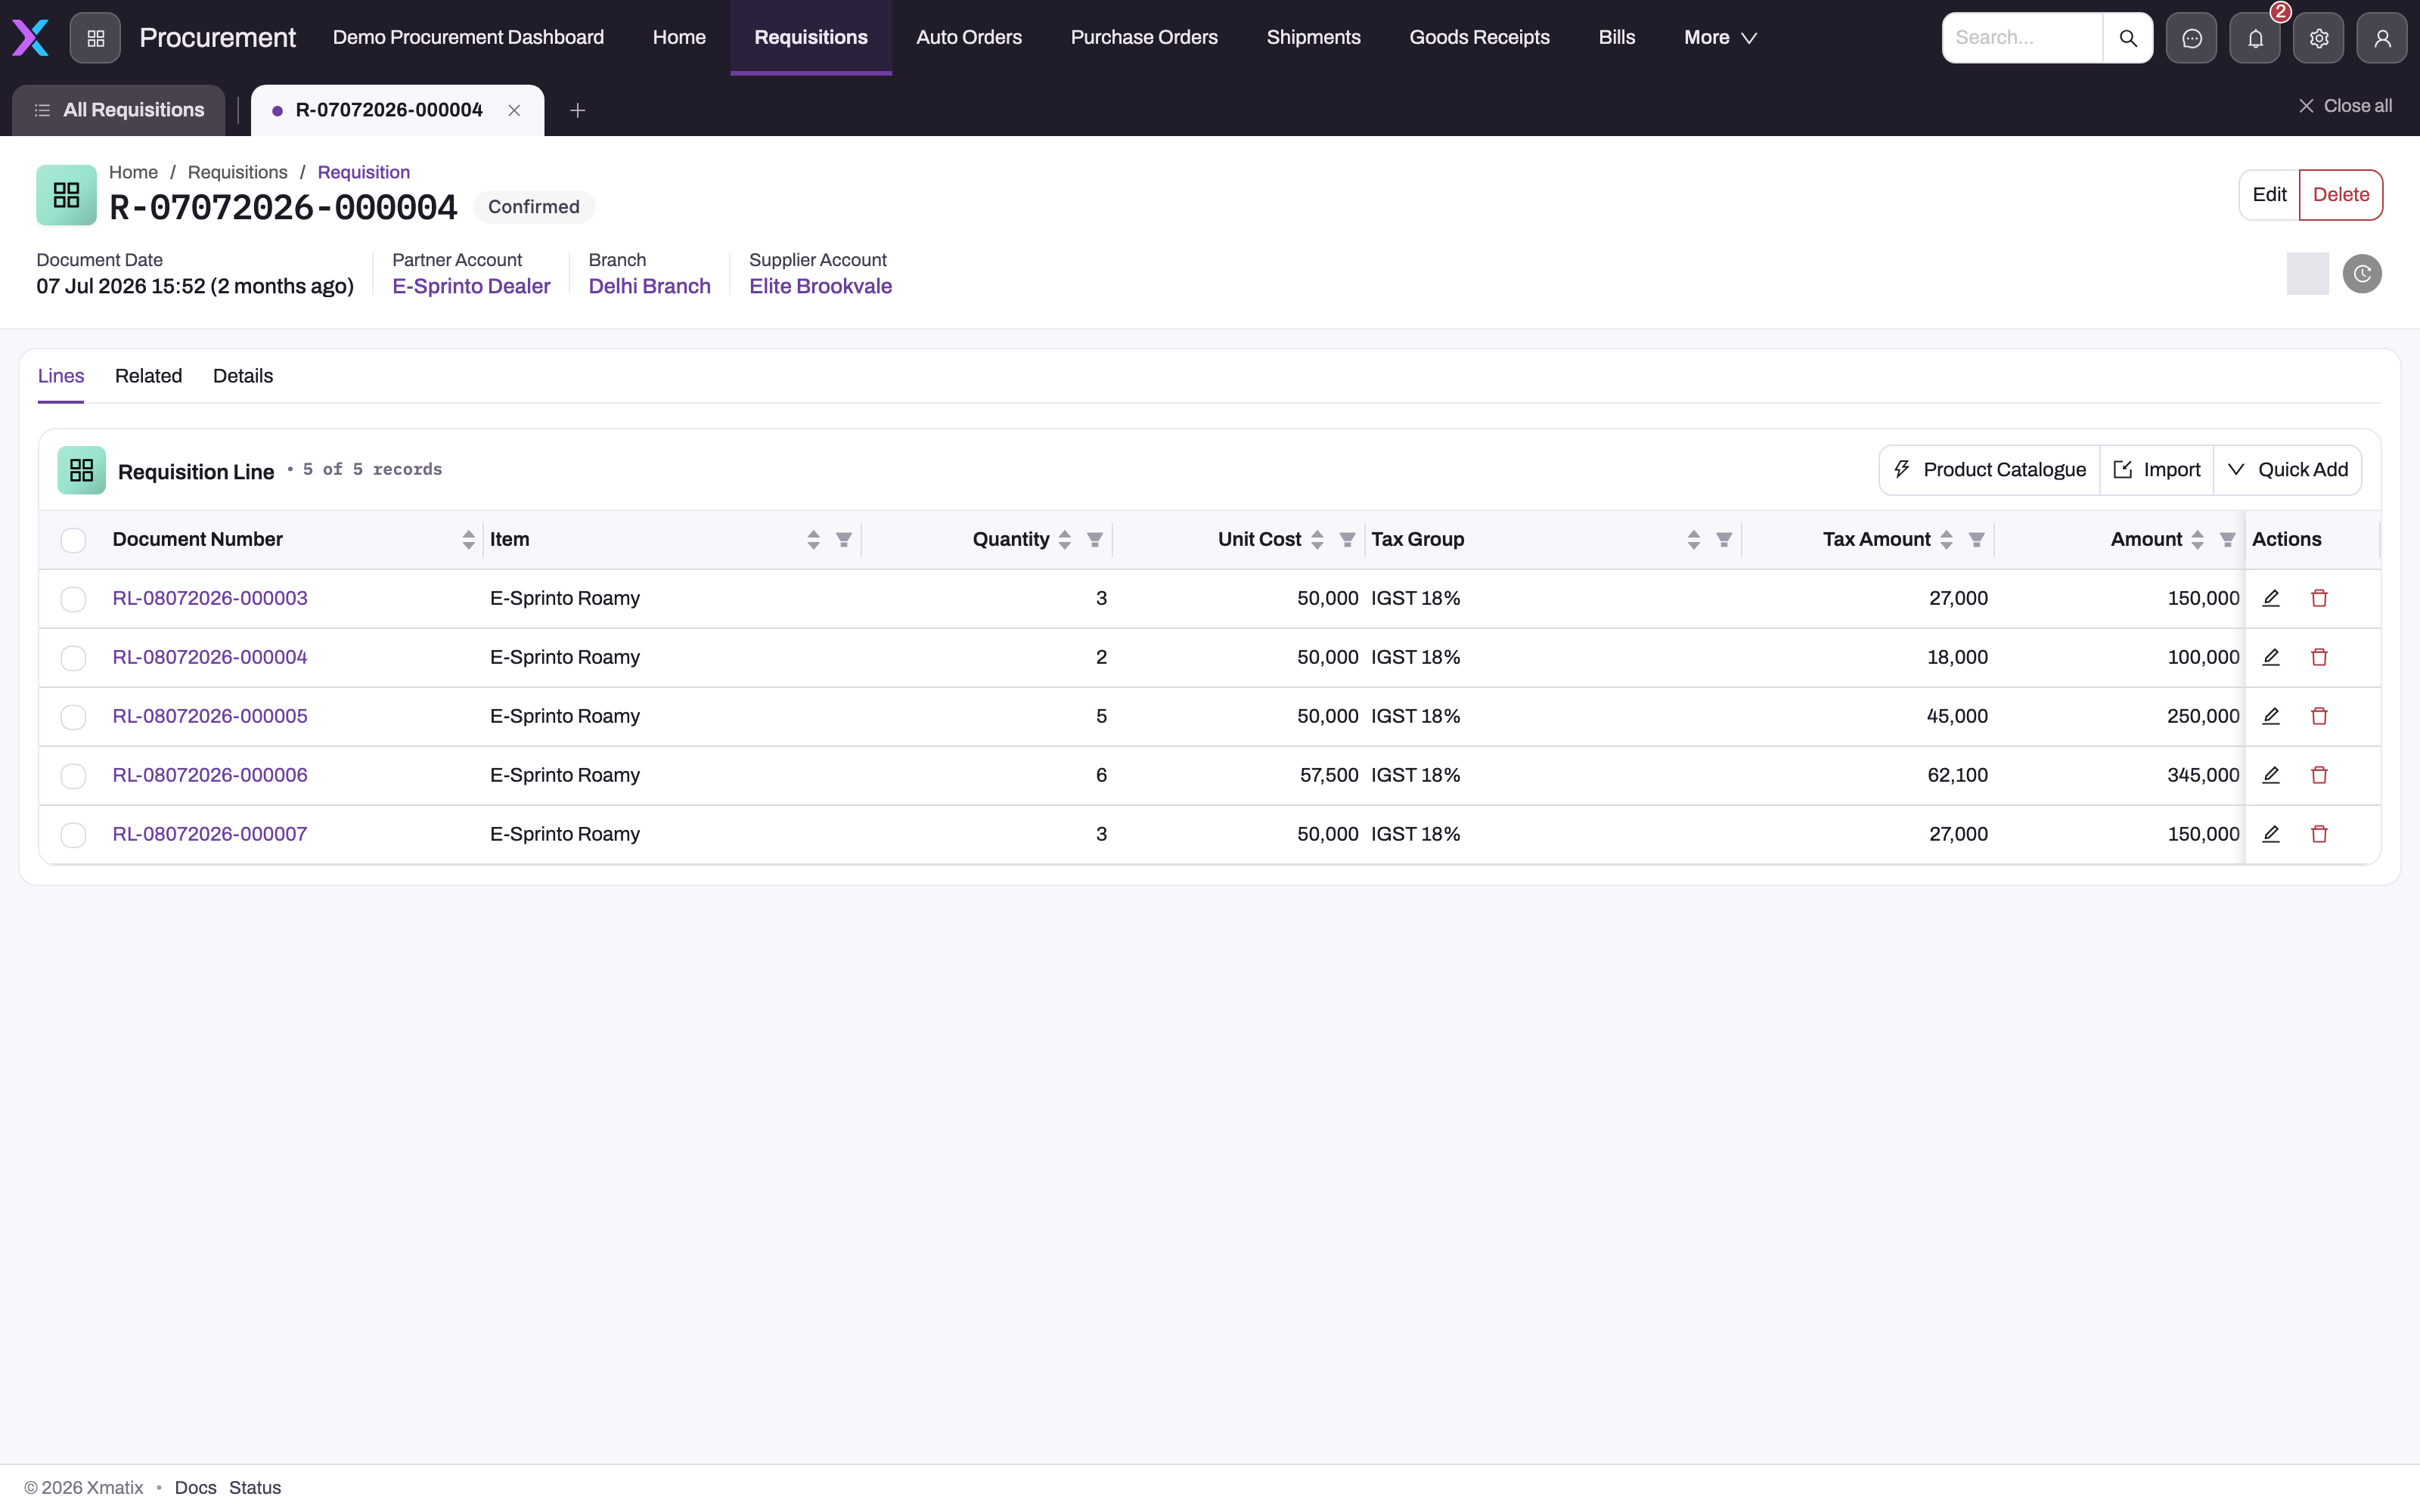
- 1
The Status badge (Confirmed) is a value someone set; it does not change when lines are released.
- 2
Quick Add inserts one line, Product Catalogue picks several items at once, Import loads a file - every line needs an item and a quantity above zero.
- 3
Quantity is what was requested; it cannot be lowered below what purchase orders or transfers already carry for the line.
- 4
Unit Cost is looked up from the requisition's price list and can be overridden; Amount is quantity x unit cost with no discount.
- 5
Tax Group and Tax Amount are resolved from the item and the header taxes; they roll into Total Line Tax Amount.
- 6
Tick lines here, then run Selective Release Order or Selective Release Transfer with a Requested Quantity per ticked line.
Step 3 — Read what is pending
Each line carries three counters:
| Counter | Meaning |
|---|---|
| Purchase Order Quantity | Rolled up from the purchase-order lines that point back at this line. |
| Stock Transfer Quantity | Rolled up from the transfer lines that point back at this line. |
| Pending Quantity | Quantity − Purchase Order Quantity − Stock Transfer Quantity — what a release can still take. |
The header's Total Quantity Pending (on Details) is the sum over the lines. The three counters are line fields; the default Lines grid shows quantity, unit cost, tax and amount, so add the counter columns to the grid or open a line to read them. Because the counters are roll-ups from downstream documents, a line's Quantity cannot be reduced below what has already been released (Quantity cannot be less than the already transacted quantity), and a line with purchase-order quantity cannot be deleted. Release actions only work while at least one line has a pending quantity greater than zero.
Step 4 — Release to a purchase order
Two header actions create the purchase order:
- Release Order releases every line that still has pending quantity.
- Selective Release Order takes chosen lines. Tick the lines in the Lines grid, enter a Requested Quantity on each, and run the action. Each requested quantity must be greater than zero and no more than that line's pending quantity; anything else is rejected before any order is created.
The new purchase order copies the requisition's supplier account, partner account and branch, is linked to the requisition (Requisition on the order header), and each of its lines is linked to the requisition line it came from with the released quantity and the line's unit cost. Lines that are already fully released are skipped, and no order is created when nothing is left to release.
Step 5 — Or release to a stock transfer
When the request should be met from your own stock, set From Branch to the supplying branch and use Release Transfer or Selective Release Transfer. They work the same way but create an outward stock transfer from From Branch to the requesting Branch, linked to the requisition; the transfer's inward leg receives the stock at the requesting branch.
Step 6 — Follow the released document
From here the purchase order takes over — see the purchase order lifecycle. Selective releases whittle the pending quantities down; return to the requisition any time and release the remainder, to the same supplier or a different one.
An order can also pull open requisition lines in from the other side: on a purchase order that already has a supplier and branch, Add Requisition takes every open line of the requisitions you pick, and Selective Requisition Lines takes chosen lines at a requested quantity. Only requisitions for the same supplier account and branch qualify, and lines already pulled into that order are not offered twice.
Expected result
Every requisition line shows a quantity, purchase-order and transfer quantities, and a pending quantity that reconcile arithmetically. Each release creates purchase-order or transfer lines that point back at the requisition lines and reduces pending quantity only by the released amount; a fully released line reaches zero and cannot be released again. If a downstream document looks wrong, inspect its requisition-line link and released quantity before raising a duplicate request.
Common problems
- "At least one Requisition Line with quantity greater than zero is required to create Purchase Order." Every line is either fully released already or has no quantity. Check the pending quantity on each line.
- A selective release is rejected for a quantity. The requested quantity for a line exceeds its pending quantity. Reduce it to at most what is pending.
- "RequisitionLines argument is required for SelectiveReleaseOrder action." No line was ticked before running the selective action.
- "Requested quantity must be greater than zero." A ticked line has a blank or zero Requested Quantity; enter the quantity to release on every ticked line.
- "Quantity cannot be less than the already transacted quantity." You tried to lower a line below what its purchase orders or transfers already carry. Adjust the downstream document instead.
- The purchase order has no supplier. The requisition's Supplier Account was empty when it was released; set the supplier on the order.
Common questions
Can one requisition produce several purchase orders?
Yes. Use Selective Release Order repeatedly — for example one release per supplier, changing nothing but the lines you tick — until every line's pending quantity reaches zero. Note that the requisition's own Supplier Account is copied onto each order it creates, so change the supplier on the order when the requisition was raised without one or for a different supplier.
Does the Status field change when I release?
No. Draft and Confirmed are values you set; releasing to an order or a transfer does not touch them. Use Total Quantity Pending and the line counters to see where a request stands.
Do open requisitions affect auto-ordering?
Yes, in one place: the Forecasting auto-order engine counts open requisition lines as committed demand when its Consider purchase requisition option is on, so quantities people have already asked for are not suggested twice. A line can be left out of that math with its Exclude In Auto Order flag. See auto-order.