
The import wizard loads records into one entity at a time from an Excel, CSV or JSON file. You upload the file, map its columns to the entity's fields, optionally validate everything with a dry run, then run the import in the browser or as a background job. Every row gets its own result, and the Import History table keeps each run reviewable, downloadable and — for failed rows — retryable.
Prerequisites
- The data-import capability (
setup.data.import.manage) on one of your security profiles. It gates the Data Import navigation item and the job endpoints; the row writes themselves run under your ordinary record permissions. - Create permission — and Update permission, if rows will update existing records — on the target entity. Each row is written exactly as a manual save would be: mandatory fields, validation scripts, business rules, automation, and record- and field-level security all apply per row.
- A file in
.xlsx,.xls,.csvor.jsonformat. The soft file-size limit is 100 MB and one file may hold at most 50,000 rows; split anything larger. From the Map Columns step you can download a header-only template per entity, and starting from that template avoids most mapping problems. - For related data, a load order: import parents first (accounts), then children (their orders), so lookup columns in the child file have records to match.
Procedure
Step 1 — Open Data Import and start the wizard
Go to Setup → Platform Operations → Data Import. The page body is the Import History table; the only action is Start Import in the page header, which opens the Import Data wizard with three steps: Upload File & Select Entity, Map Columns and Import. Restart Import at the bottom-left clears the wizard at any point.
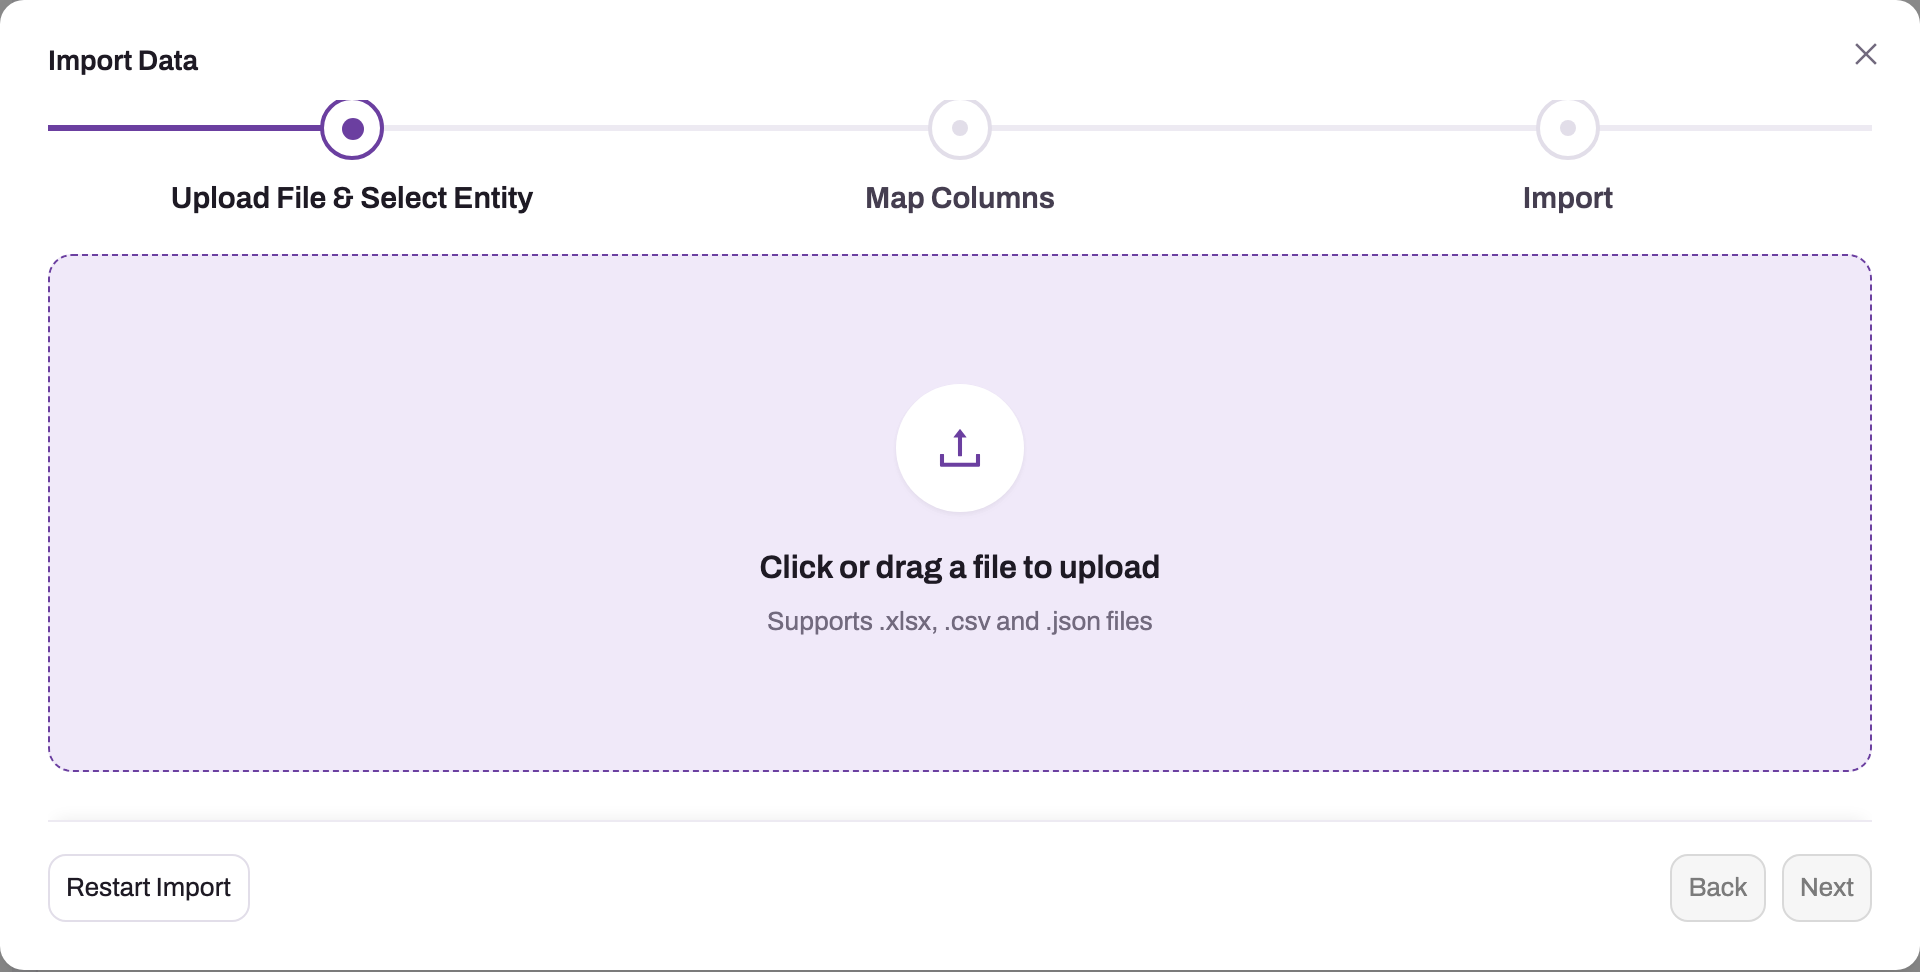
- 1
Step 1 parses the file locally and then asks for the target entity — nothing is uploaded yet.
- 2
Map Columns proposes a mapping per upload column and holds Download Template and Batch Size.
- 3
Import shows the preflight card and the Dry Run, Run Async and Import Now buttons.
- 4
Drop a .xlsx, .xls, .csv or .json file here; one file, one entity, at most 50,000 rows.
- 5
Restart Import clears the wizard at any step without touching data.
- 6
Next is enabled once a file is parsed and an entity is selected.
Step 2 — Upload the file and select the entity
Drop the file on the upload area (or click it to browse). The file is parsed in the browser — nothing is uploaded yet — and the wizard reports how many columns it detected. Then choose the target entity in Select Target Entity; the searchable list contains every entity you may import into. An import loads one entity per run.
Step 3 — Map columns
The Map Columns table lists every upload column with a Status, a Maps To selector and a Detail note. The wizard proposes a mapping automatically, in this order:
- A dot-notation column such as
Account.Namemaps to the lookup fieldAccount, matched on the parent'sName. - An exact field-name match (case-insensitive).
- A field-label match, for non-lookup fields.
- A close spelling (one or two characters off) is marked Suggested — review these before running.
Anything else is Skipped. Change any row with Maps To; the first option, Skip (do not import), drops the column. Lookup columns may hold display values rather than ids: a value that matches no record is reported per row as a transform error and the row is not sent. Several dot columns on one lookup act as a composite key (Account.Name plus Account.AccountNumber). Picklist columns must contain the field's legal values exactly — they are validated by the normal write pipeline, not pre-checked here.
Two more controls sit on this step: Download Template (a CSV with one header per active importable field, lookups written as Parent.Name) and Batch Size (1–100, default 25 rows per request for browser-driven runs). A batch size above 50 shows a warning because large batches can exceed the request timeout; use Run Async instead of pushing it higher.
Step 4 — Check the preflight card
The Import step opens with a Ready to import into {entity} card showing total rows, mapped columns and batch size, followed by preflight alerts:
- More than 50,000 rows: the import is blocked — split the file.
- 2,000 rows or more: Run Async is recommended.
- Columns mapped to system-managed fields (Id apart, fields such as CreatedBy, OwnerId or RowVersion) are ignored.
- Unmapped columns, and values in the first 200 rows that do not convert to the field's type, are listed as warnings.
Required fields are not checked here; a missing mandatory value surfaces as a row error when you run.
Step 5 — Choose how to run
Three buttons run the import:
| Button | What it does | When to use it |
|---|---|---|
| Dry Run | Sends every row through the server-side validation pipeline and writes nothing. The uploaded file is kept, and the run is recorded in Import History with type DryRun. | Always, before a first load of a new file or entity. |
| Run Async | Uploads the file to storage and queues a background job. Progress streams back to the wizard; Stop watching only stops the live view, the job keeps running. | Anything large (the wizard recommends it from 2,000 rows), or whenever you cannot keep the tab open. |
| Import Now | Writes rows from the browser in batches of the configured size, with a live per-row result table. The run is also recorded in Import History as type Sync. | Small, interactive loads where you want to see each row's outcome immediately. |
An Import Now run depends on the browser tab: if the tab closes mid-run, rows already written stay, and the history row can remain at Processing because nothing on the server finishes it. Prefer Run Async when in doubt.
Step 6 — Read the results
For every row the result is Created, Updated, Error or Transform Error (the row never reached the server, typically an unresolved lookup). Import Now shows an Import Results table with Row #, Status, Id and Error, plus Download Errors and Download Success buttons that build CSVs in the browser. Each row commits in its own transaction, so errors never roll back the good rows.
A run ends as Completed (no errors), Partial (finished with error rows) or Failed. Row errors are the entity's own guardrails — a missing mandatory field, an illegal picklist value, a validation script, a record you may not update — so read the message rather than re-running blind.
Step 7 — Use Import History
Every run appears in Import History with Job ID, Status, Entity, Type (Sync, Async or DryRun), Records (live progress while running), Result (created, updated and error counts), Uploaded File, Failed Rows, Submitted and Submitted By.
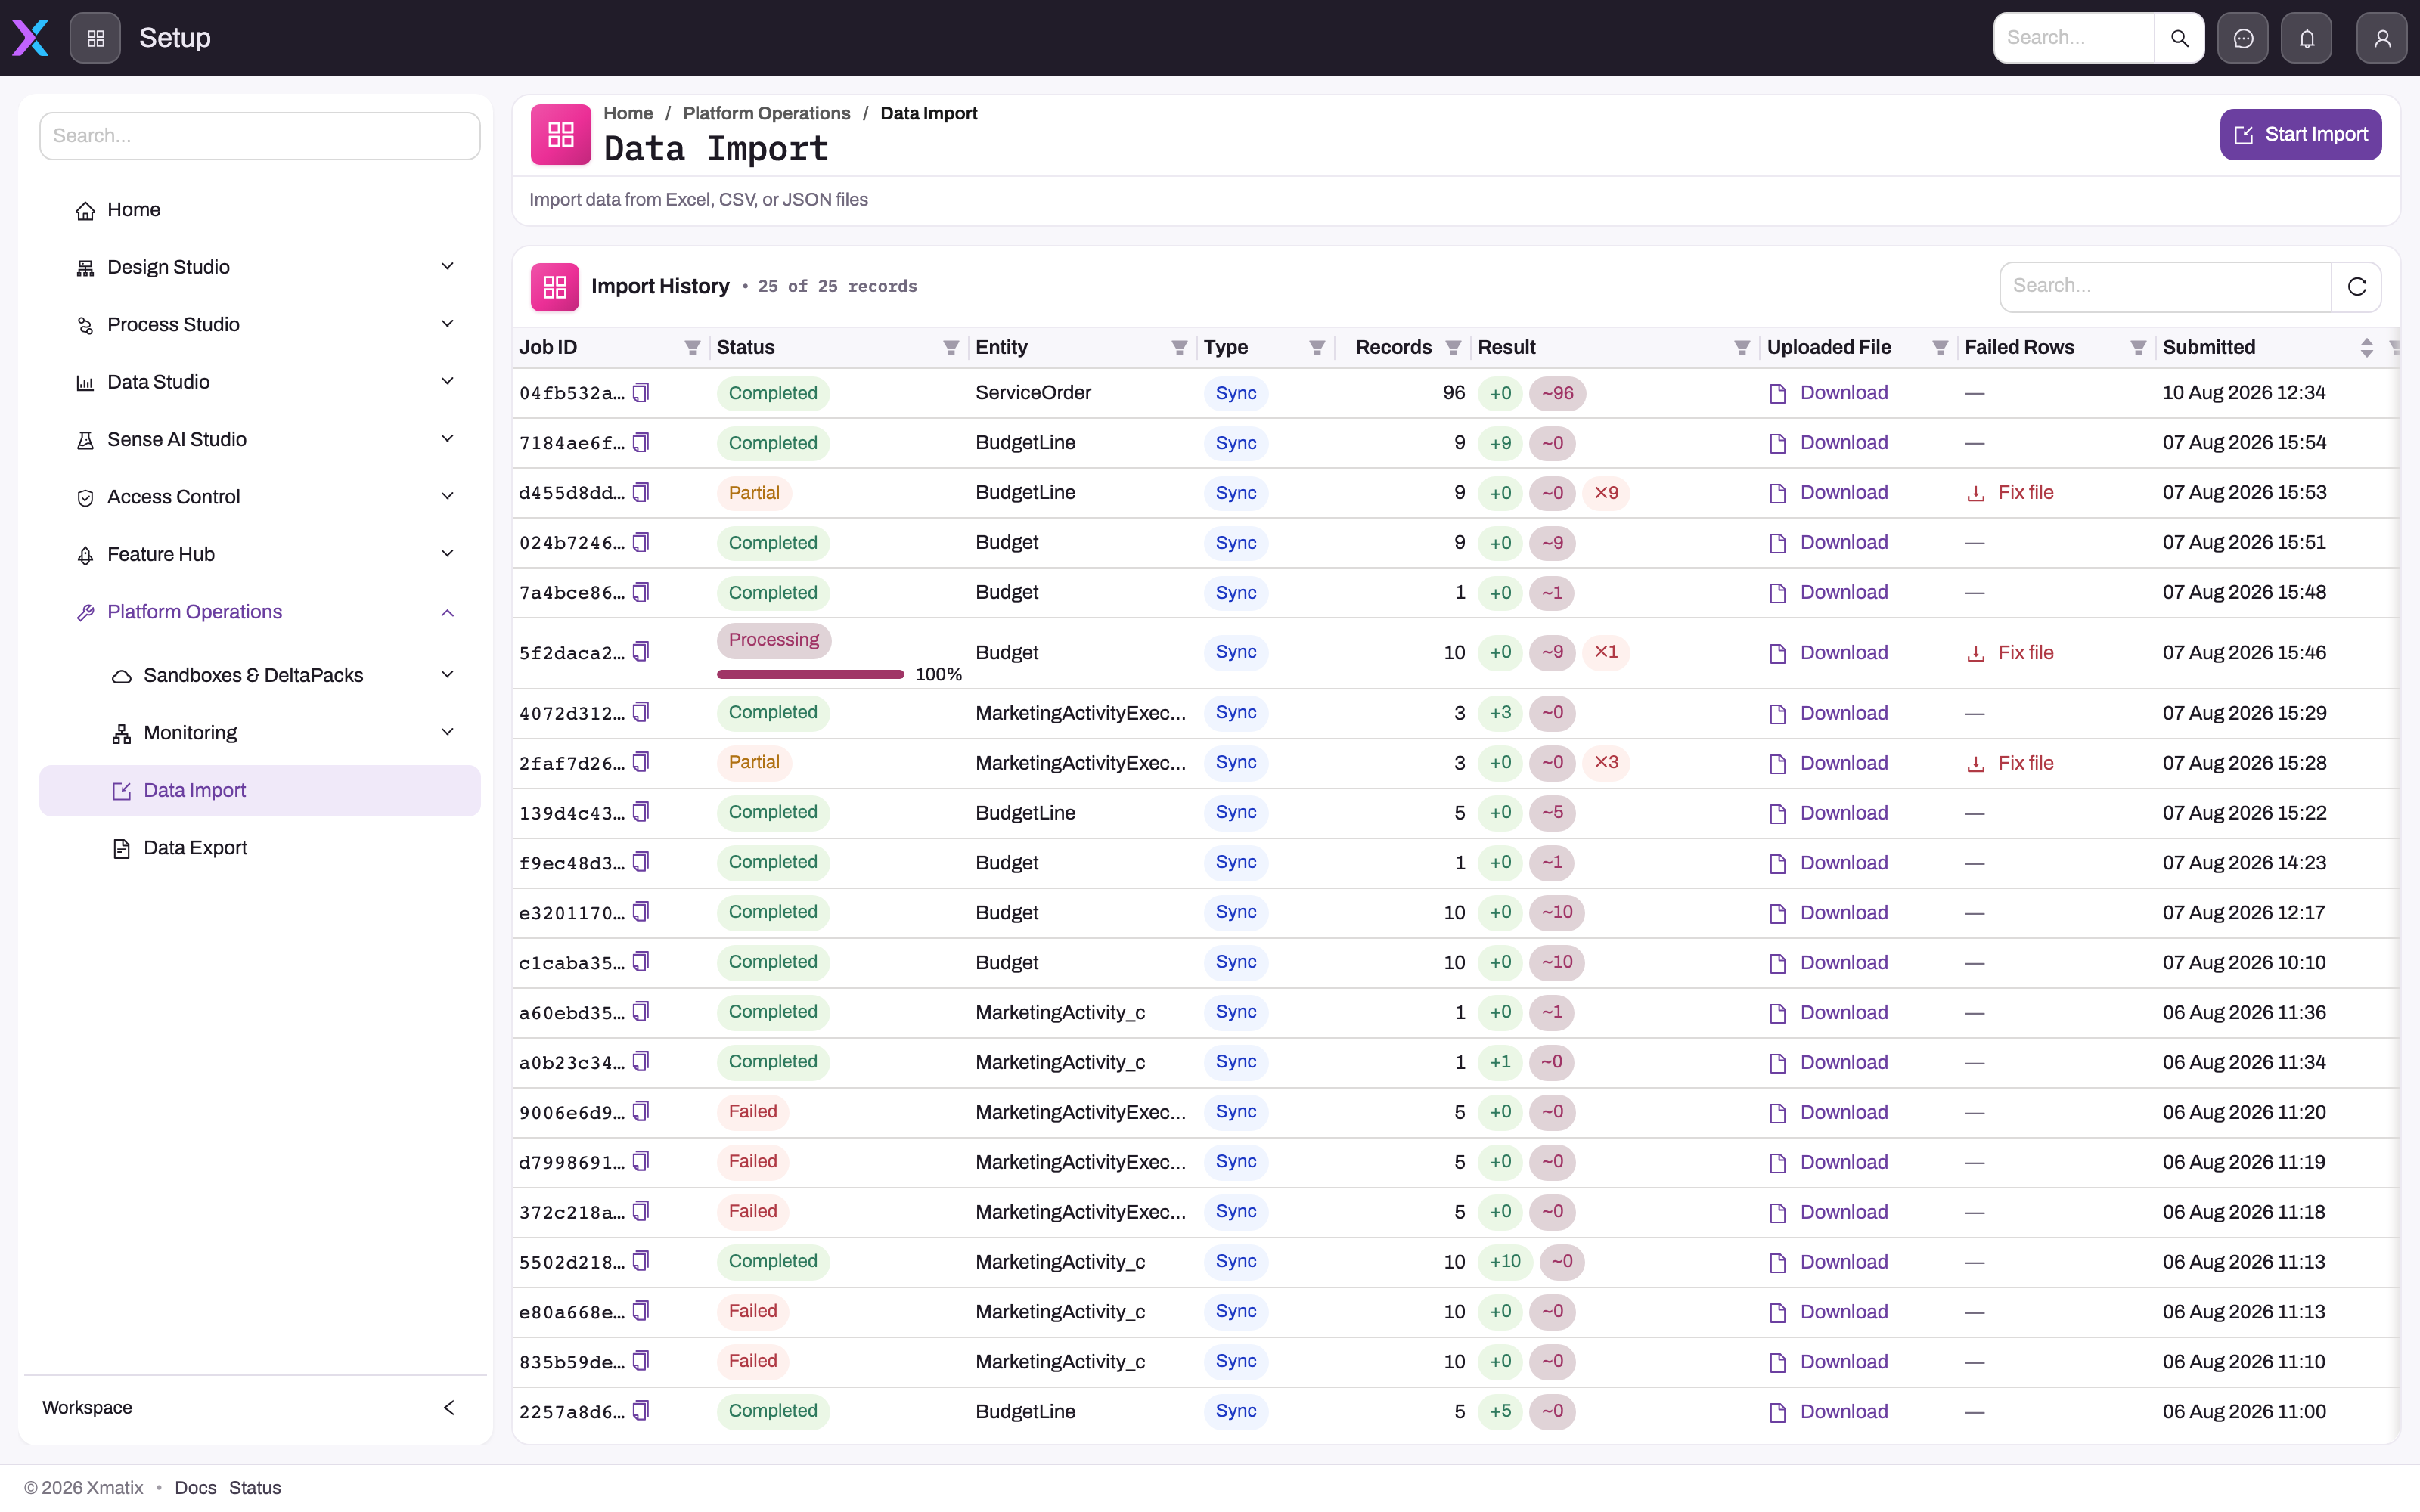
- 1
Start Import is the only action; it opens the wizard as a modal over this history.
- 2
Status ends as Completed, Partial (finished with row errors) or Failed; running jobs show progress.
- 3
Type records how the run was executed: Sync (Import Now), Async (background job) or DryRun.
- 4
Result splits the rows into created (+), updated (~) and errored (x) counts.
- 5
Download returns the original file; it is removed after a clean Completed run and kept otherwise.
- 6
Fix file downloads only the failed rows with an _error column, ready to correct and re-import.
- Uploaded File → Download returns the original file. After a clean Completed run the file is removed and the cell says so; it is kept for Partial, Failed and DryRun runs.
- Failed Rows → Fix file downloads a CSV of only the failed rows with their original columns plus an
_errorcolumn; correct it and import that file. - Retry (Partial or Failed jobs whose file is still stored) queues a new job that replays only the failed rows, linked to the original.
- Import jobs also appear under Setup → Platform Operations → Monitoring → Jobs with type ImportJob — but retry them from Import History; the Jobs screen's own Retry and Cancel actions apply to a different job type.
Expected result: Import History shows the run as Completed or Partial, the created and updated counts match what you expected from the file, and every failed row has an actionable message or a fix file.
Common problems
- Duplicates after a re-import. A row updates an existing record only when it carries the record's
id, or anexternalIdthat matches exactly one existing record. Every other row creates a record, so re-importing a file without either key duplicates it. Deduplication rules feed the duplicate finder; they do not block imports. - "Record with Id … not found". The
idcolumn holds a value that matches no record (often an id copied from another organization or a deleted record). The row errors instead of creating a duplicate, which is the safe outcome; fix the id or clear it to create. - Lookups fail to resolve. The display value in the child file does not match a parent record exactly — a spelling or spacing difference, or the parent was never imported. Fix the values in the fix file and retry only those rows.
- A partially applied import. Expected behaviour: rows commit independently. Use Fix file or Retry for the failed rows; do not re-run the whole file.
- An automation storm. Every imported row fires the entity's business rules and automation exactly like a manual save, so a 20,000-row import can enqueue 20,000 automation runs. Review what is active on the entity — and run a Dry Run first — before a large load.
Common questions
How do I update existing records instead of creating new ones?
Include an id column holding each record's identifier: rows with an id update that record as a partial update (unmapped fields are left alone); rows without one are matched on externalId if you map it and exactly one record carries that value; otherwise the row creates. The reliable way to get ids is to export the records first, edit the file, and import it back.
Can I import more than one entity in one run?
No — each run targets a single entity. For a related data set, run one import per entity, sequenced parent-first, so that each child file's lookup columns resolve against records that already exist. Keep the display values in the child's lookup columns identical to the parent records, or those rows fail as unresolved lookups.
What is the difference between Dry Run and the preflight warnings?
Preflight is a quick browser-side check of the mapping: row count, ignored system fields, unmapped columns and type conversion on a sample. A Dry Run sends every row to the server and runs the real validation pipeline — mandatory fields, validation scripts, security — without writing, so it is the only way to see the complete error list before committing.
Can I undo an import?
There is no single undo. Imported rows are ordinary records, so the good rows of a bad run must be found and deleted like any other data — deleted records land in the recycle bin for a grace window, from which they can be restored. Prevent the mess instead: dry-run the file, load a small test file, check the results, then load the rest. See data lifecycle concepts.